wiring ideas for the dactyl: wiggles and weaves
2020/08/11
I got some questions about my previous post about bending PCBs, so I wanted to share two other small developments on that theme: fitting a PCB into the Dactyl, and an alternative wiring scheme for single-key PCBs.
update: Fmcraft of HID Technologies has done a beautiful board with similar ideas, check it out.
wiggles
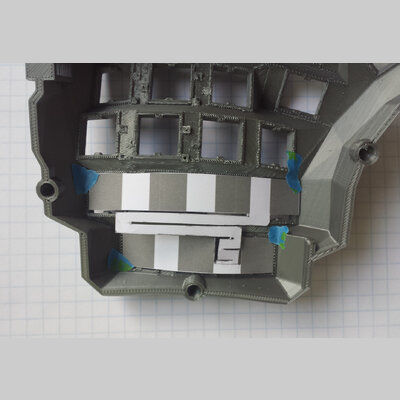
I wanted to do a quick proof of concept for a Dactyl PCB using the ideas previously mentioned. Above's an image of a paper prototype demonstrating my approach. Grey regions are the required area for a switch PCB footprint. Generally, the idea is to strategically cut 1mm slots into the PCB. An important little trick is using the space between switches to squeeze in more wiggles, which is probably required for the extreme elevation changes between switch columns on the Dactyl.
weaves
I have another related idea, especially suited to wiring one-off ergonomic keyboards. The 'state of the art' is using a 1-key PCB like the Amoeba or Enabler. These generally require (approximate average, per switch) 8 solder points and two small pieces of wire, which is extremely labor intensive.
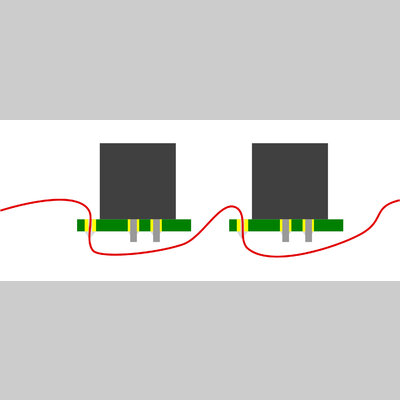
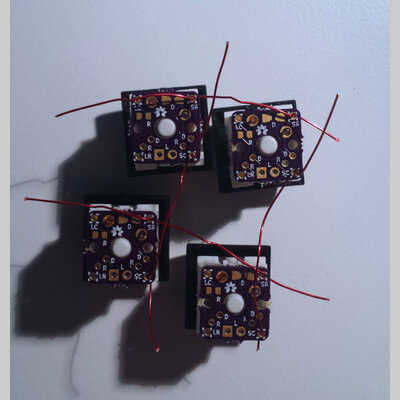
My idea uses magnet wire (which does not need to be stripped before soldering) to connect the switch PCBs, weaving a single strand through each row and column. This reduces the per-switch labor to 6 solder points with no wire cutting.
As an aside, SMD diodes should also be used, ideally with a panelized version of the PCBs and a stencil, so they can be soldered en-masse very quickly. Even without panelization, SMD can be done very quickly by hand if you use a hot air station, toaster, hot plate, etc. I suspect it may also be economical to have them fabricated with the diode by a Chinese service like JLCPCB.
Hope this gives some inspiration to anyone out there making weird keyboards!


